Belfield Quay
SM32 - 16mm scale - 32mm gauge

Overview The Layout Trackwork Rollingstock Buildings Electrics
Rolling stock
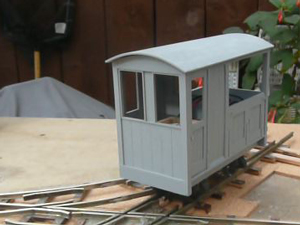
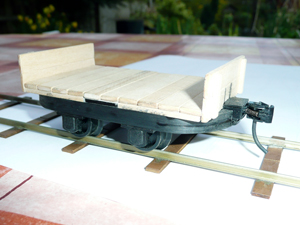 The first items of rolling stock specifically produced for BQ were a pair of flat wagons. These were based on a Binnie skip wagon chassis, with a strip wood timber platform and ends. 'O' scale Kadees were fitted.
The wagons were very free-wheeling, so steel wheels were turned as replacements for the plastic ones supplied, and extra lead fixed to the bottom.
Kadees go right back to my time on a O-16.5 layout called Cottesmore West. The 'hands-off' shunting capability was something I'd missed in garden railways, so Kadees were 'a must' for Belfield Quay.
 I'd forgotten all about these - 6 of them and a flat wagon with a pair of garden benches on it!- found in a box in the garage. Made for the garden railway, but never used. Once the plastic wheels and couplings are replaced and they've been re-painting and weathered, they could be ideal for BQ.
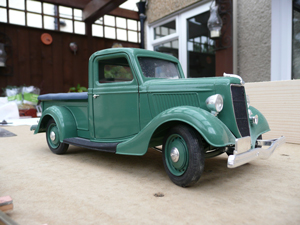 Not strictly rolling stock, but this Ford pick-up has it's own place on the layout. It's just called a 'Ford V6' on the base and is a Solido model, which has been stripped and repainted. It is actually 1:19 - not the usual 1:18.
A Loco - of sorts!
Once the controls and trackwork really came together, I just had to get a loco. I'd been struggling on a 'serious' model, but something 'quick' was needed. Various boxes and bags were rumaged providing a motor from a cd player(?), Binnie nylon coach wheels, some worm gears, the proverbial rubber band and this appeared ...
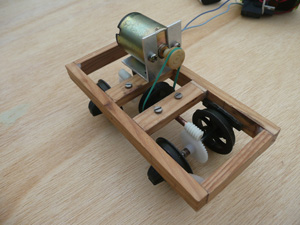
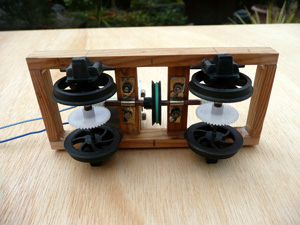
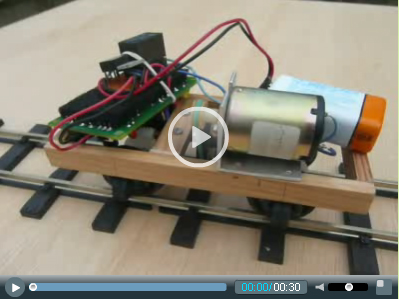
There's NO sound unit - honest. Just a load of bits that aren't concentric or don't fit very well. I think it's wonderful - all it needs now is some bodywork ...
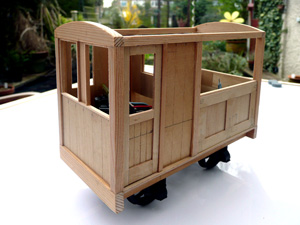
I toyed with another diesel like Derek, but in the end opted for a timber framed railcar. The final push came from viewing a British-Japanese website - The Takasaki Light Railway, which has inspired several vehicles and features. (I'm definitely having a brewery wagon!)
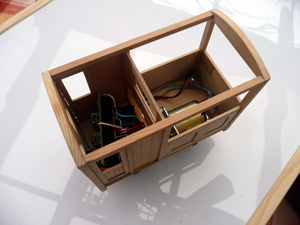
The design came instantly - a maintenance car, with an open back for tools and materials. The motor position dictated the size of the cab, which was big enough for the IR control unit and the open area was perfect for the battery, which can easily be changed. I'm tempted to paint it white and call it Ernie as it is virtually a milk-float on rails, but available spray cans will probably be the final arbiter.
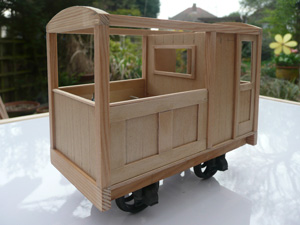

The last photo shows additional 'metalwork' details - plasticard fixed to the wooden body with copious liquid plastic glue. The roof was made by laminating two sheets of 0.8mm plywood taped to a large tin can. Cab steps, door and flap hinges etc have yet to be fitted. And I'm not sure whether to fill-in the holes in those curly spokes or not. Maybe not.
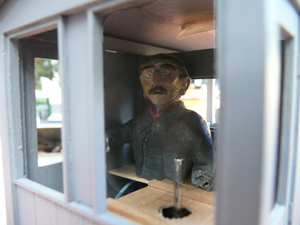
Now known as Vinny's Shed - the maintenance car has a coat of grey primer - and Vinny himself!
Couplings
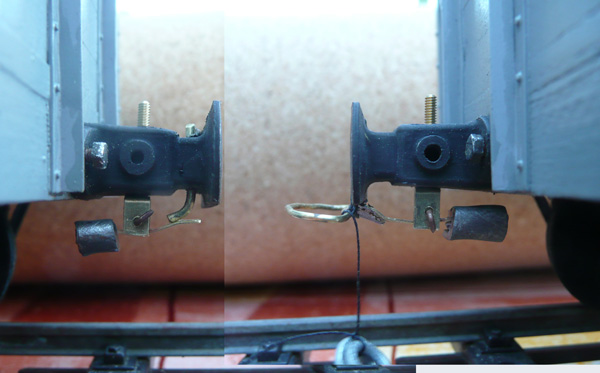
Ever since operating on Cottesmore West, I've been a fan of Kadees and BQ was going to have them too. Indeed, early stock had O gauge units fitted straight away. However, when I dug out the under-track Kadee magnet, set up some test track and had a play, I wasn't happy. I don't know why, but they didn't quite suit my stock. It didn't help when the steel wheels & axles bound on the magnet - a doubt set in. I'm sure it could be solved, but thoughts went back to ExpoNG 2010 a few weeks earlier, when I was taken by the simplicity of the Greenwich coupling. I decided that a smaller central magnet would solve the problem (it has an up-down action rather than the side-to-side Kadee), but it didn't have a delay feature. Could I do my own version?
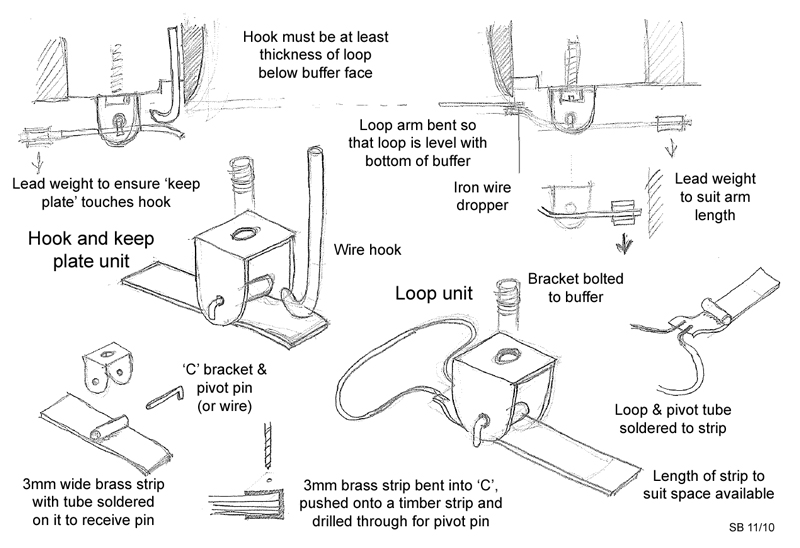
After a lot of Googling I came across the Dingham Autocoupler. I quickly decided that an inverted Dingham type coupling set under a small Binnie buffer (which I used extensively on the garden railway), might just work. After some doodling, a sketch design emerged - a hook with a keeper (stops the loop engaging when 'in delay') and a loop with a dangly bit pulled down towards the magnet. I'm sure you can figure out how it works.
As you can see, I'm no engineer, so the construction is basically very simple. There's a lot of tweaking required to get all of the elements just right, but I'm very pleased with the first attempt. The washers on a string will be replaced with a soft-iron wire dropper (or chain), the loop wire could be thinner and all of the coupler parts blackened. Although they are essentially simple, they are still a bit fiddly to make. However, there won't be much stock on BQ and they will make shunting really interesting.
The birth of the "Belfield Coupler"?
Overview The Layout Trackwork Rollingstock Buildings Electrics